What I’m Working On…

30 07 2008

I have been an odd combination of really lazy and super busy the past couple of weeks.  I have several craft projects in the works – I’m crochetinga baby hat and blanket for a coworker, I’m thinking about doing Ravelry‘s Ravelympics, trying to finish the Anda dress from BurdaStyle, and I’m trying to recover my couch (see below).  I haven’t cooked too much (I’m blaming the heat), but I’m also working on creating a weekly menu  so I can do my shopping ahead of time and make something delicious each night (more on that later).

I am also working on another blog (!) for my local free paper.  I’m going to chronicle the transformation of my apartment, and everything related to keeping that up.  Hopefully that will be as fun as I think it is going to be.  That should be launching in a couple of weeks.

But for now I’ll leave you with the pillowcase cover I made for my couch.  It’s going to look fantastic if I ever get it done…


Let the Redecorating Commence!

15 07 2008

My current roommate is moving out, and a new one is moving in.  I’m sad to see the old one go, and I’m sad to see all of her belongings that I’m so used to using go as well.  But at least this gives me a chance to redecorate my apartment, since she is basically moved out and the new one won’t be moved in completely until the middle of next month.

So I’m planning an overhaul of the apartment – that includes the common room, my  bedroom, the kitchen and the bathroom.  But I’m desperately trying to do this on a budget.  We’ll see how this goes.

I first decided to plan out exactly what I needed to thrift/buy/make to have an apartment I’m comfortable in and one that looks good as well.  I discovered Better Homes and Gardens’ Arrange-a-Room, and I had a lot of fun planning out my new space.  For example, here is the common area before:                         

And after:                  

I added notes in pink so I would know what I need to move from other rooms, buy from thrift stores, or buy new.  As you can see, I also plan on recovering my couch, recliner, and chair so they all match.  (I will post real life before and after pictures as well, so you can see the glorious golden corduroy couch.)

I started to draw out floor plans by hand, but this one is much more fun.  You can specify the room size by feet, so your virtual floor plan is to scale.  Hope you enjoy this feature as much as I did!

ETA: You can see my other rooms and my plans for them here.


Stuffed Zucchini Flowers

15 07 2008

My coworker was reminiscing the other day about her father frying up some zucchini flowers with a bit of olive oil and garlic.  I was intrigued, because I had never hear of such a thing, but I loved the fact that you could eat zucchini flowers.  (I’m a big fan of using the most you can of both vegetables and animals.)  So I was delighted to come across a vendor at the market on Saturday that was selling the flowers by themselves!  Instead of just frying them up, however, I wanted to make something with a little more sustenance, so I stuffed them, similar to stuffed peppers.

Stuffed Zucchini Flowers

  • Zucchini flowers (I worked with about 10 of them)
  • 1 whole zucchini
  • 2 Tbsp olive oil
  • Salt and pepper
  • 1/2 lb. ground beef
  • 1/4 c. shredded Italian cheese (I had leftover ParmigianoReggiano)
  • 1 c. marinara sauce (I was lazy and used store bought, or you can learn how to make your own here.)
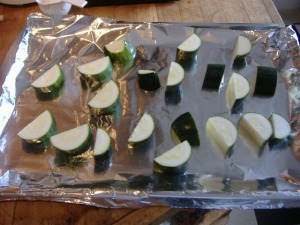
  1. Wash and cut your zucchini in half lengthwise, then into 1/2-in. pieces.  Place them on a foil lined cookie sheet and drizzle the olive oil over them.  Season with salt and pepper, and broil both sides until softened and slightly browned.  
  2. Put the zucchini pieces in a skillet and mash them up the best you can.  Add the ground beef and cook on medium heat until browned.           
  3. Wash the zucchini flower, both inside and out.  The petals are delicate, so be gentle.  You can remove the pistils and the stamens from the inside, but I let mine in.  Stuff the zucchini flowers with the beef and mashed zucchini mixture.  Place the stuffed flowers in a baking dish and cover each flower with the shredded cheese.  Preheat the oven to 350 degrees and bake the flowers for about 10 minutes.                                                 
  4. While the stuffed flowers are baking, heat up the sauce.  I put some leftover zucchini and ground beef in for flavoring.                                 
  5. When the cheese is golden brown and bubbling, take the baking pan out of the oven.  Serve the stuffed flowers with the marinara sauce.


I thought this was a great and slightly unusual dish.  There are a lot of variations you could do – I’ve read about zucchini flowers in soups, stir fries and salads.  I can wait to incorporate this into my meals more often!


Strawberry Rhubarb Freezer Jam

15 07 2008

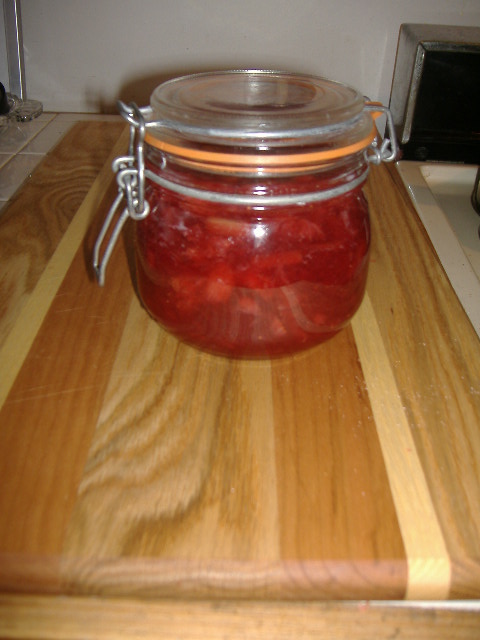
I was shopping at the VOA the other day and I found a cute little canning jar that was made in France for $1.  I bought it with no real plan in mind, other than I knew I would be able to find a use for it somehow.  I then was reminded that I had several quarts of strawberries and a nice bunch of rhubarb from the public market that I did not want to go bad, so I decided to try a freezer jam of my favorite fruit combination.

Strawberry Rhubarb Freezer Jam (makes 4 cups, I made a half batch to fit my jar)

  • 2 1/2 c. rhubarb, peeled and chopped
  • 2 1/2 c. strawberries, hulled and cut in half
  • 1/4 c. water
  • 3 c. sugar
  • 1 package strawberry Jello
  1. Prepare the fruit. 
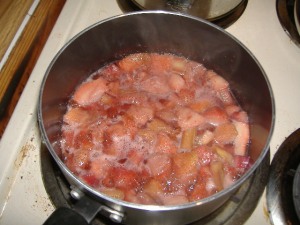
  2. In a medium saucepan, bring the water and the fruit to a slow boil.
  3. Mash the softened fruit into a puree.  Stir in the sugar and bring back to a boil.  Add the packet of Jello and bring back to a boil.  Stir constantly.
  4. Pour mixture into containers.  Let cool and either store in the refrigerator for two weeks or in the freezer for a few months.  Do not store at room temperature.

I spread this on some crumpets and it was very delicious!  It tasted fresh, and the combination of the sweet strawberries and the tart rhubarb is amazing.  This would be great on English muffins, on bagels with cream cheese, even spread over pancakes.  I don’t mine is going to last much longer than a week!


Watermelonade

14 07 2008


Watermelonade

Originally uploaded by maryagon

The boyfriend got me a cute vintage bike for our one year anniversary, so I’ve been riding it around the neighborhood. Luckily for me, my grocery store is only two miles from my house, so yesterday evening I biked down to pick up a few things. I got a nice, small watermelon that I was looking forward to enjoying that week.

But when I got back to my apartment, I was pretty much dying of thirst (it was warm, and I’m a little out of shape). I remembered I saw a recipe for a delicious and refreshing sounding watermelonade on epicurious, so I decided to make that instead of eating it whole.

Watermelonade (makes 4 cups)

  • 1 small seedless watermelon
  • 1 Tbsp sugar
  • 1 Tbsp fresh lemon juice
  • Ice
  1. Cut the watermelon into small chunks.  Puree in a blender or a food processor.
  2. Place a mesh strainer over a measuring cup and pour the puree through it.  I pressed the puree a bit with the back of a soup ladle to get the most juice out, but that made the watermelonade a bit pulpy.  I ended up straining it twice.
  3. Pour the strained juice into a container and add the sugar and lemon juice.  Mix well.  Serve over ice.

The end result was indeed very refreshing.  This would be a great picnic drink – easy to make, and good for you!  (The watermelon is 92% water by weight, and a great source of vitamins A and C!)  This is making me think of what other fruits I can make into “-ades”…

ETA:  I just tried it with some club soda – very yummy!  This combo is a little less sweet and by adding club soda, it will make your batch last longer!